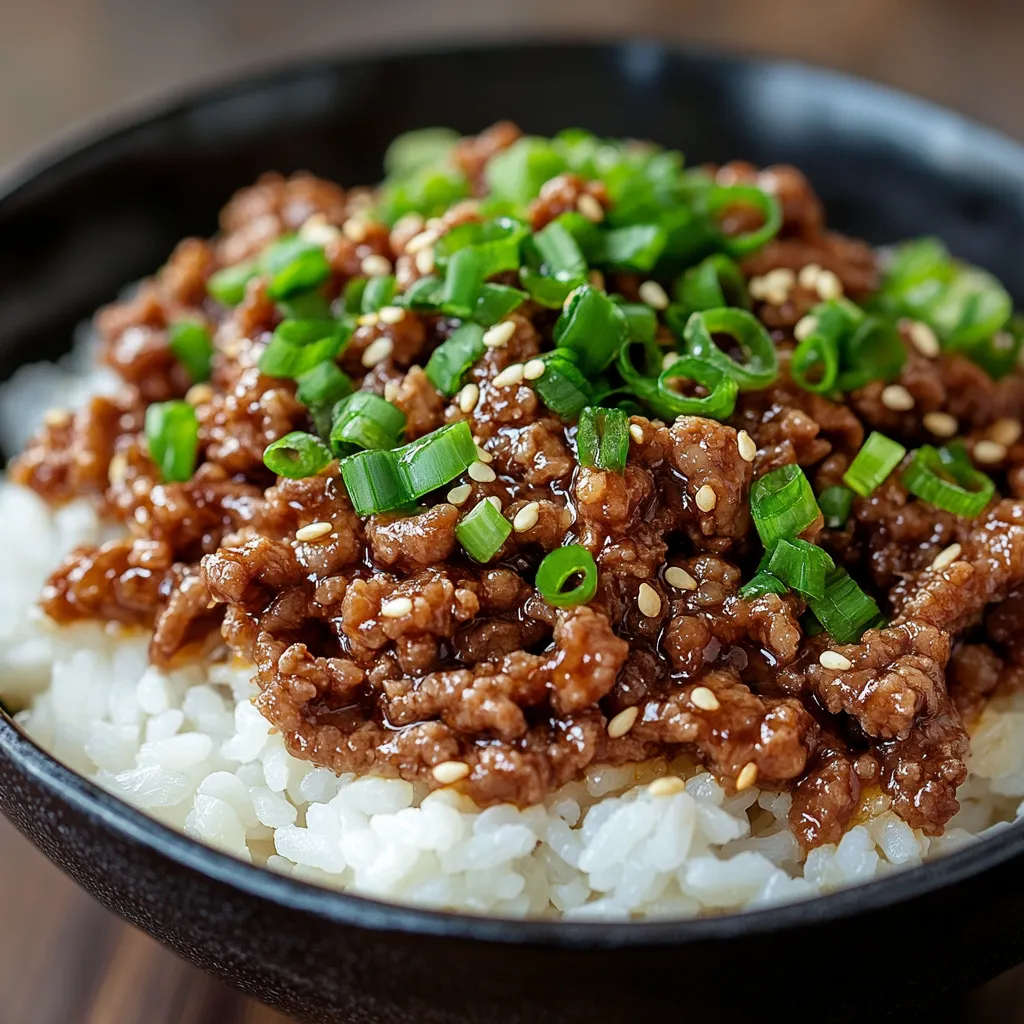
Are you craving a Korean Ground Beef Bowl that’s bursting with flavor but don’t want to spend hours in the kitchen? You’ve come to the right place! This delicious Korean Ground Beef Bowl recipe combines sweet, savory, and slightly spicy flavors in a quick meal that’s perfect for busy weeknights. Ready in just 20 minutes, this homemade Korean Ground Beef Bowl has become a reader favorite for good reason – it’s incredibly tasty, budget-friendly, and simpler than takeout!
As someone who’s tested countless Korean beef recipes, I can confidently say this ground beef bowl hits all the right notes with its perfect balance of ginger, garlic, and the signature sweetness that makes Korean beef so irresistible. Let’s dive into creating this mouthwatering dish that will transport your taste buds straight to Seoul!
Why You’ll Love This Korean Ground Beef Bowl
- Ready in just 20 minutes! Perfect for those busy weeknights when you need dinner on the table fast.
- Budget-friendly meal that feeds a family of four for under $15.
- Meal prep champion – stores beautifully for up to 4 days in the refrigerator.
- Customizable heat level – make it as mild or spicy as you prefer.
- Kid-approved flavors that even picky eaters will devour.
- Authentic taste without hard-to-find ingredients – everything’s available at your regular grocery store.
- Healthier than takeout with options to make it even more nutritious.
- Perfect balance of sweet, savory and slightly spicy flavors.
- Versatile recipe that works with any ground meat you have on hand.

Ingredients for Korean Ground Beef Bowl
For the Korean Beef:
- 1 pound ground beef (80/20 lean-to-fat ratio works best)
- 3 tablespoons brown sugar (or substitute with 2 tablespoons honey for a natural alternative)
- 1/4 cup low-sodium soy sauce (use tamari for a gluten-free option)
- 2 tablespoons sesame oil
- 4 cloves garlic, minced (about 2 tablespoons)
- 1 tablespoon fresh ginger, grated
- 1/2 teaspoon red pepper flakes (adjust to taste)
- 1/4 teaspoon black pepper
For Serving:
- 3 cups cooked white rice (substitute cauliflower rice for a low-carb version)
- 3 green onions, thinly sliced
- 1 tablespoon sesame seeds
- 1 cup shredded carrots
- Optional: sliced cucumbers, kimchi, fried egg
How to Make Korean Ground Beef Bowl – Step by Step
Step 1: Prepare the Korean Beef Sauce
- In a small bowl, whisk together the brown sugar, soy sauce, sesame oil, minced garlic, grated ginger, red pepper flakes, and black pepper until well combined.
- Set aside to allow the flavors to meld while you cook the beef.
Step 2: Cook the Ground Beef
- Heat a large skillet over medium-high heat.
- Add the ground beef and cook until no longer pink, breaking it into small pieces with a wooden spoon (about 5-7 minutes).
- Drain excess fat if necessary, leaving about 1 tablespoon in the pan for flavor.
Step 3: Combine and Finish
- Pour the prepared sauce over the cooked ground beef.
- Stir well to coat all the meat evenly.
- Bring to a simmer and cook for 2-3 minutes until the sauce has slightly thickened and the beef has absorbed the flavors.
- Taste and adjust seasoning if needed.
Step 4: Assemble the Bowls
- Divide the cooked rice among 4 serving bowls.
- Top each bowl with a generous portion of the Korean beef mixture.
- Garnish with sliced green onions, sesame seeds, and shredded carrots.
- Add any additional toppings of your choice such as kimchi, cucumber slices, or a fried egg.

Pro Tips for Making the Best Korean Ground Beef Bowl
- Don’t skip the sesame oil! This ingredient is crucial for authentic Korean flavor and cannot be substituted effectively.
- Fresh ginger makes a difference. While ground ginger works in a pinch, fresh ginger provides a much brighter, more vibrant flavor to your Korean beef.
- Brown the meat properly. Allow your ground beef to develop some caramelization for enhanced flavor – don’t just steam it!
- Adjust sweetness to taste. Authentic Korean beef bowls tend to be slightly sweet, but you can reduce the sugar if preferred.
- Make it spicier by adding gochujang (Korean chili paste) or more red pepper flakes.
- For meal prep, store the beef and rice separately for best results.
- Use freshly minced garlic rather than pre-minced for the most aromatic flavor.
- Try ground turkey or chicken as a leaner alternative that still tastes delicious with these flavors.
Best Ways to Serve Korean Ground Beef Bowl
The classic Korean Ground Beef Bowl is served over steaming white rice with a sprinkle of green onions and sesame seeds, but there are many delicious ways to enjoy this versatile dish:
- Serve in lettuce wraps for a low-carb option – butter lettuce or romaine hearts work perfectly.
- Add a fried egg on top for an extra protein boost and that gorgeous runny yolk.
- Include traditional banchan (Korean side dishes) like kimchi, pickled daikon, or cucumber salad.
- Turn it into Korean beef tacos by serving in corn tortillas with quick-pickled vegetables.
- Create a grain bowl with mixed grains like quinoa and brown rice for extra nutrition.
- Serve over zucchini noodles or shirataki noodles for a lower-carb alternative.
The best accompaniment to a Korean beef bowl is a simple side of kimchi, which adds probiotic benefits and complements the flavors perfectly. A small side salad with a rice vinegar dressing also pairs wonderfully with this dish.
Nutritional Information for Korean Ground Beef Bowl
Per serving (based on 4 servings):
- Calories: 450 kcal
- Protein: 25g
- Carbohydrates: 48g
- Fat: 18g
- Fiber: 2g
- Sugar: 10g
- Sodium: 720mg
Note: This nutritional information is for the Korean ground beef served over white rice. For a lower-carb version, substitute cauliflower rice to reduce the carbohydrate content by approximately 30g per serving.
Storage & Leftovers
Your Korean Ground Beef Bowl makes excellent leftovers that taste even better the next day as the flavors continue to develop:
- Refrigeration: Store the beef and rice separately in airtight containers for up to 4 days.
- Freezing: The Korean beef mixture freezes beautifully for up to 3 months. Thaw overnight in the refrigerator before reheating.
- Reheating: For best results, reheat the beef in a skillet over medium heat with a splash of water or broth to prevent drying out. Microwave rice with a damp paper towel over it to retain moisture.
- Meal prep tip: Portion the beef, rice, and vegetables into individual containers for grab-and-go lunches throughout the week.
FAQs for Korean Ground Beef Bowl
Can I make Korean Ground Beef Bowl ahead of time?
Yes! Korean Ground Beef Bowl is perfect for meal prep. The beef actually tastes even better the next day as the flavors have time to develop. Store the beef and rice separately in airtight containers and reheat when ready to eat. It will keep well in the refrigerator for up to 4 days.
What can I use instead of brown sugar in Korean Ground Beef?
The sweetness is characteristic of authentic Korean beef, but you have several options: honey, maple syrup, coconut sugar, or even a keto-friendly sweetener like monk fruit or erythritol will work. Each will alter the flavor profile slightly but will maintain the sweet-savory balance that makes Korean beef so delicious.
Is Korean Ground Beef spicy?
Traditional Korean beef has a mild to medium heat level. This recipe includes red pepper flakes which provide a gentle warmth. You can easily adjust the spice level by increasing or decreasing the amount of red pepper flakes. For authentic Korean heat, add 1-2 teaspoons of gochujang (Korean chili paste).
Can I use ground turkey instead of beef for this recipe?
Absolutely! Ground turkey, chicken, or even pork work wonderfully in this recipe. When using leaner meats like turkey or chicken, you might want to add an extra teaspoon of sesame oil to compensate for the lower fat content and maintain that rich flavor that makes Korean beef bowls so satisfying.
Related Recipes You’ll Love
If you enjoy this Korean Ground Beef Bowl, be sure to try these other delicious Asian-inspired recipes:
- Easy Beef and Broccoli Stir Fry – Ready in just 25 minutes and better than takeout!
- Honey Garlic Chicken – Sweet, sticky, and irresistibly good.
- Quick Pork Fried Rice – The perfect way to use leftover rice.
- Teriyaki Salmon Bowls – A healthy alternative with the same bowl format you love.
- Spicy Shrimp Stir Fry – For seafood lovers who enjoy a kick of heat.
Conclusion
This Korean Ground Beef Bowl recipe is the perfect solution for busy weeknights when you want something delicious, satisfying, and quick. With its irresistible balance of sweet, savory, and slightly spicy flavors, it’s no wonder this dish has become a reader favorite! The beauty of this Korean beef recipe is its simplicity – minimal ingredients and prep time, yet maximum flavor.
Now that you know how to make the best Korean Ground Beef Bowl at home, you can enjoy this restaurant-quality meal anytime the craving strikes. Don’t forget to customize it with your favorite toppings and sides to make it your own!
Have you tried making Korean Ground Beef Bowls at home? Share your experience in the comments below! Did you add any special toppings or make any tweaks to the recipe? We’d love to hear how you made this recipe your own!

Best Korean Ground Beef Bowl Recipe – Easy and Flavorful
- Total Time: 30
- Yield: 4 servings 1x
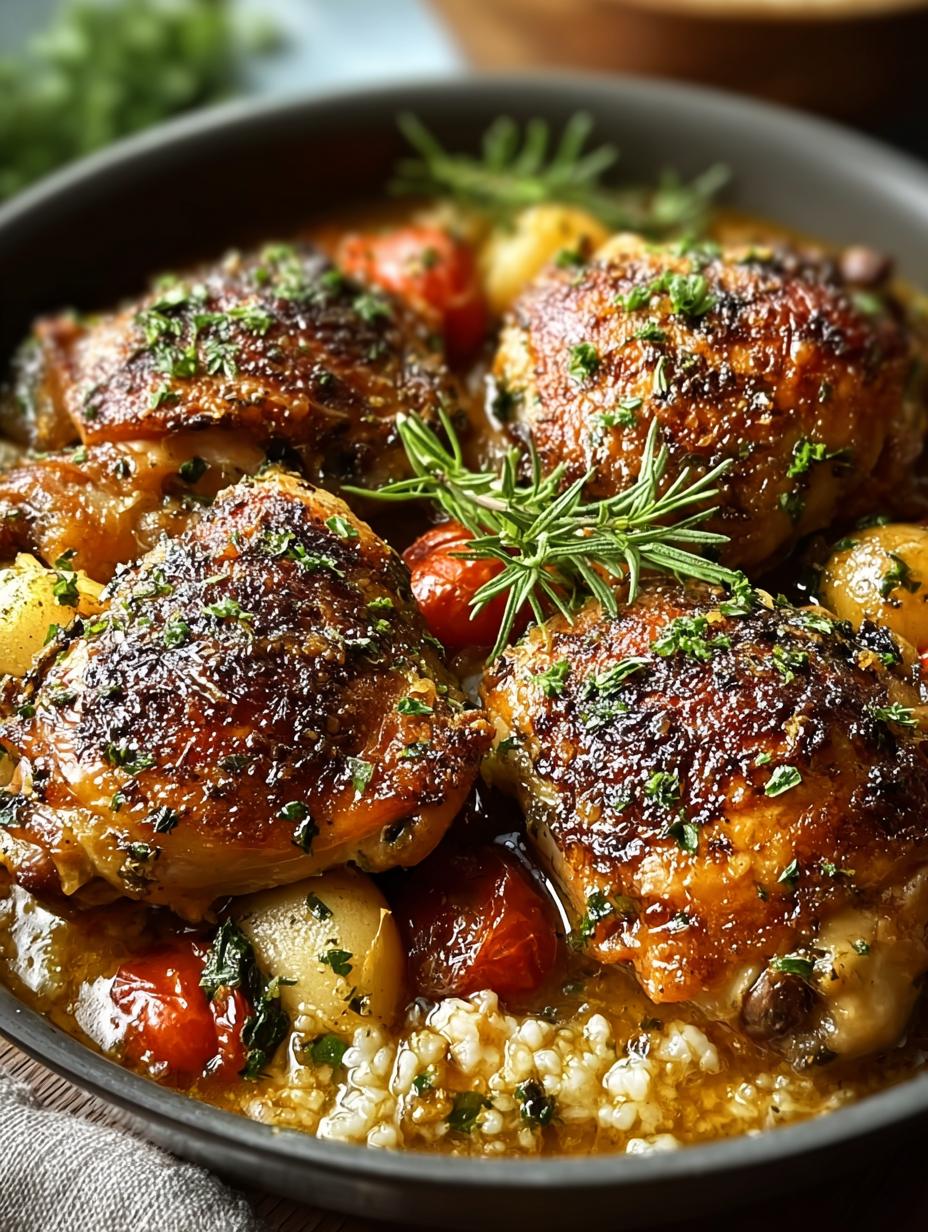
Description
This Creamy Smothered Chicken and Rice is the ultimate comfort food! Tender chicken breasts smothered in a rich, velvety sauce served over fluffy rice. Ready in just 30 minutes, it’s perfect for busy weeknights while still delivering restaurant-quality flavor.
Ingredients
- For the Chicken:
- 1.5 pounds boneless, skinless chicken breasts (or thighs for more flavor)
- 2 tablespoons olive oil
- 1 teaspoon garlic powder
- 1 teaspoon onion powder
- 1 teaspoon paprika (smoked paprika works wonderfully too)
- ½ teaspoon dried thyme
- Salt and freshly ground black pepper, to taste
- For the Creamy Sauce:
- 2 tablespoons butter
- 1 medium onion, finely diced
- 3 cloves garlic, minced
- 1 cup chicken broth (low sodium recommended)
- 1 cup heavy cream (for a lighter option, use half-and-half)
- 1 teaspoon Dijon mustard
- 1 tablespoon fresh lemon juice
- ½ cup Parmesan cheese, grated
- 1 teaspoon Italian seasoning
- ¼ teaspoon red pepper flakes (optional, for heat)
- For Serving:
- 2 cups cooked rice (white, brown, or cauliflower rice for a low-carb option)
- Fresh parsley, chopped for garnish
- Additional grated Parmesan cheese
Instructions
Step 1: Prepare the Chicken
- Pat the chicken breasts dry with paper towels. This ensures the best sear on your chicken.
- Season both sides of the chicken with garlic powder, onion powder, paprika, thyme, salt, and pepper, pressing the seasonings into the meat.
- Heat olive oil in a large skillet over medium-high heat until shimmering.
- Add the seasoned chicken and cook for 5-6 minutes on each side until golden brown and cooked through (internal temperature of 165°F).
- Remove the chicken to a plate and cover loosely with foil to keep warm.
Step 2: Create the Creamy Sauce
- In the same skillet, reduce heat to medium and add butter.
- Once butter is melted, add diced onions and cook for 3-4 minutes until softened and translucent.
- Add minced garlic and cook for another 30 seconds until fragrant, being careful not to burn it.
- Pour in chicken broth, scraping the bottom of the pan with a wooden spoon to release any browned bits (this is where the flavor magic happens in smothered chicken!).
- Stir in heavy cream, Dijon mustard, lemon juice, Italian seasoning, and red pepper flakes if using.
- Bring the sauce to a gentle simmer and cook for 3-4 minutes until it begins to thicken slightly.
- Add the grated Parmesan cheese and stir until melted and incorporated into the sauce.
- Taste and adjust seasonings as needed.
Step 3: Combine and Finish
- Return the chicken to the skillet, nestling it into the sauce.
- Reduce heat to low, cover, and simmer for 5 minutes to allow the chicken to absorb some of the sauce flavors.
- For extra saucy smothered chicken, spoon some of the sauce over the chicken pieces while they simmer.
Step 4: Serve
- Place a portion of cooked rice on each plate.
- Top with a piece of chicken and generously spoon the creamy sauce over both.
- Garnish with fresh chopped parsley and additional Parmesan cheese if desired.
Notes
- For the most tender chicken, allow it to come to room temperature for about 20 minutes before cooking.
- Pound chicken breasts to even thickness before cooking to ensure they cook evenly and stay juicy.
- Don’t rush the searing process – a good golden-brown crust equals maximum flavor.
- For a thicker sauce, mix 1 tablespoon of cornstarch with 1 tablespoon of cold water and stir into the simmering sauce.
- Storage: Store leftovers in an airtight container in the refrigerator for up to 3 days.
- Freezing: Can be frozen for up to 2 months. Thaw overnight in the refrigerator before reheating gently on the stovetop.
- Prep Time: 10
- Cook Time: 20
- Category: Main Course
- Method: Stovetop
- Cuisine: American
Nutrition
- Serving Size: 1 serving
- Calories: 520
- Sugar: 2
- Sodium: 480
- Fat: 30
- Saturated Fat: 15
- Unsaturated Fat: 12
- Trans Fat: 0
- Carbohydrates: 25
- Fiber: 1
- Protein: 38
- Cholesterol: 175
Keywords: creamy smothered chicken and rice, easy chicken dinner recipe, one pot chicken recipe, creamy chicken, comfort food recipe, weeknight dinner idea, quick chicken dinner